Access Rules
The Access Rules module is the core logic management component of the S-Safe system. This feature allows you to define the permission relationship: which Cardholder Groups are authorized to swipe their cards to unlock which Doors or Elevator Floors in the building.
1. Access Rule List Interface
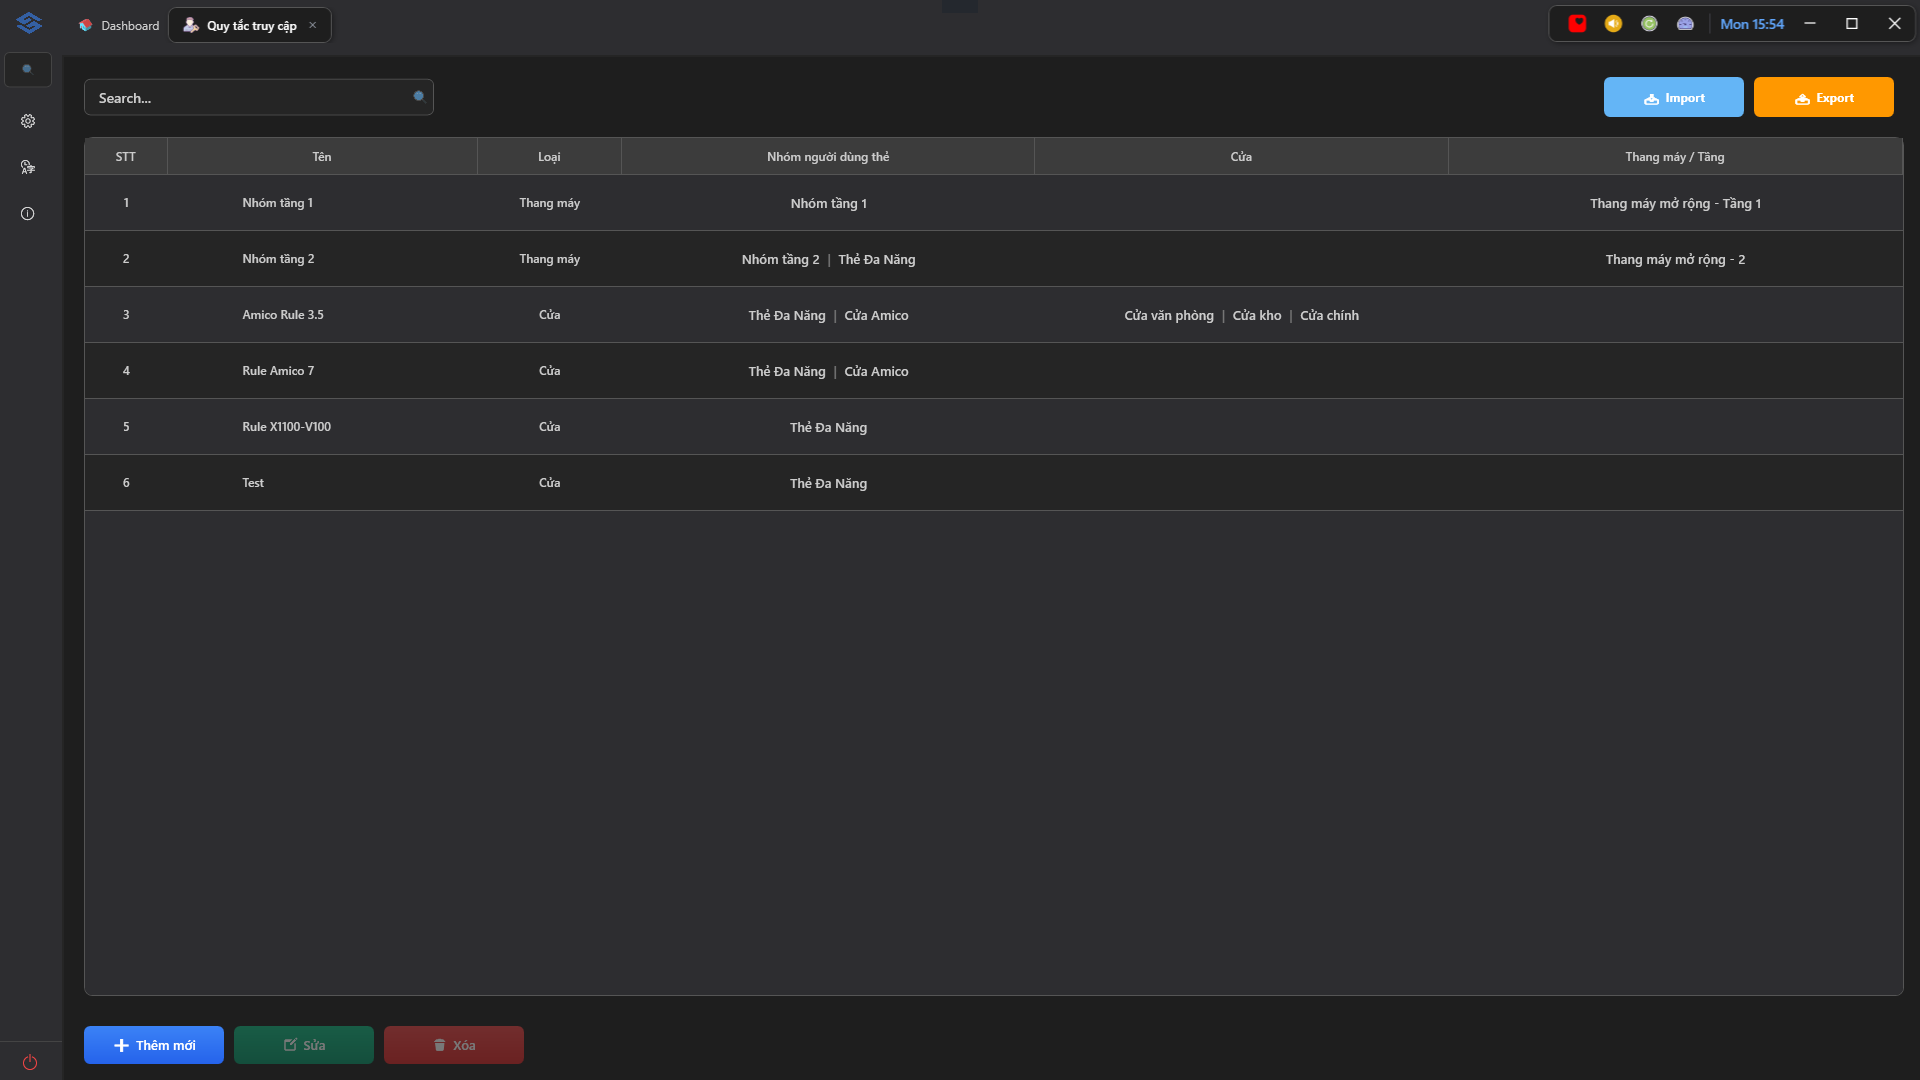
The main screen displays a list of all currently active permission rules in the system as an intuitive data table:
- No.: The sequential order number of the rule.
- Name: The identifying name of the rule (e.g., Main Entrance Access, Technical Zone Access).
- Cardholder Groups: The personnel groups to which this rule applies (groups separated by a vertical bar
|). - Doors / Elevators: The list of doors or elevator floors that the above groups are authorized to access.
- Actions: Contains Edit 📝 (blue) and Delete 🗑️ (red) buttons.
2. Adding and Configuring the Permission Matrix
When you click + Add New ➕ or the Edit 📝 button, an intuitive configuration dialog appears. The S-Safe system clearly separates the configuration flow into 2 specialized rule types:
Step 1: Basic Information Setup
- Name (*): Enter an identifying name for the rule (Required — should be clearly named by area or function for easy management, e.g., Amico Rule 3.5).
- Rule Type: Select the target application type: Door or Elevator.
Step 2: Configuration by Rule Type
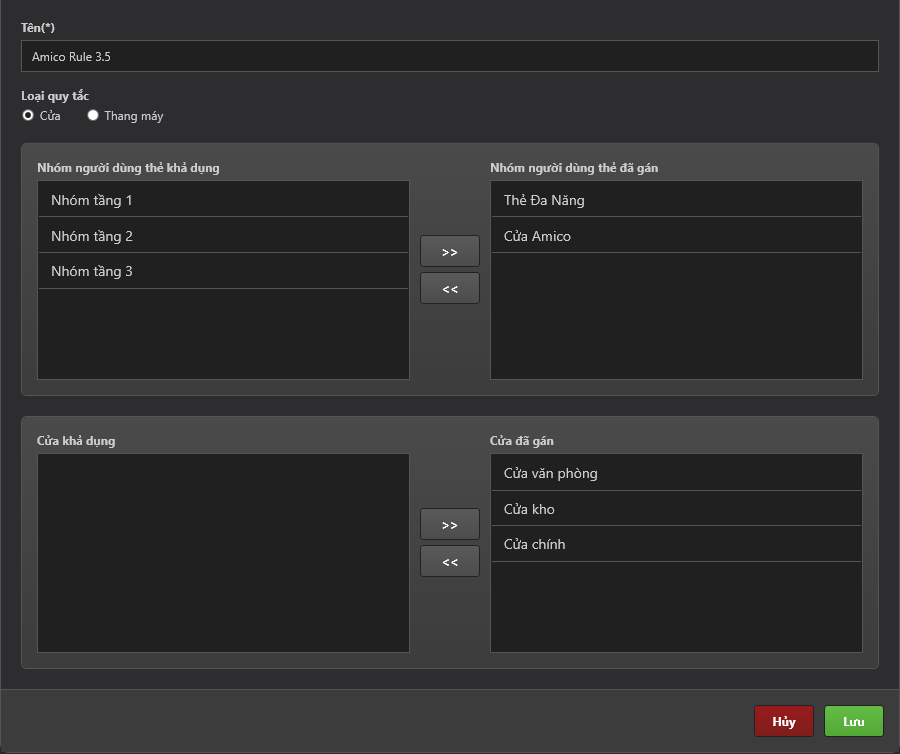
Scenario 1: Selecting "Door" Rule Type The interface will display two permission matrix panels for Cardholder Groups and Doors:
- Assign Cardholder Groups (Top): Select personnel groups from the Available column and use the
>>button to move them to the Assigned column (e.g., Multi-purpose Card, Amico Door). - Assign Doors (Bottom): Select doors from the Available column and use the
>>button to move them to the Assigned column (e.g., Office Door, Warehouse, Main Door). Doors in the Assigned column will automatically unlock when authorized personnel swipe their cards.
Scenario 2: Selecting "Elevator" Rule Type The interface switches to elevator floor control mode:
- Assign Cardholder Groups (Top): Similar to door assignment, use the
>>and<<buttons to add or remove personnel groups. - Filter and Assign Floors (Bottom):
- Use the Select elevator to filter floors dropdown menu to load the corresponding floors for a specific elevator (e.g., Expansion Elevator).
- In the Available Floors column, select the permitted floors (e.g., Floor 1, 2, 3, 4) and use the
>>button to move them to the Assigned Floors column.
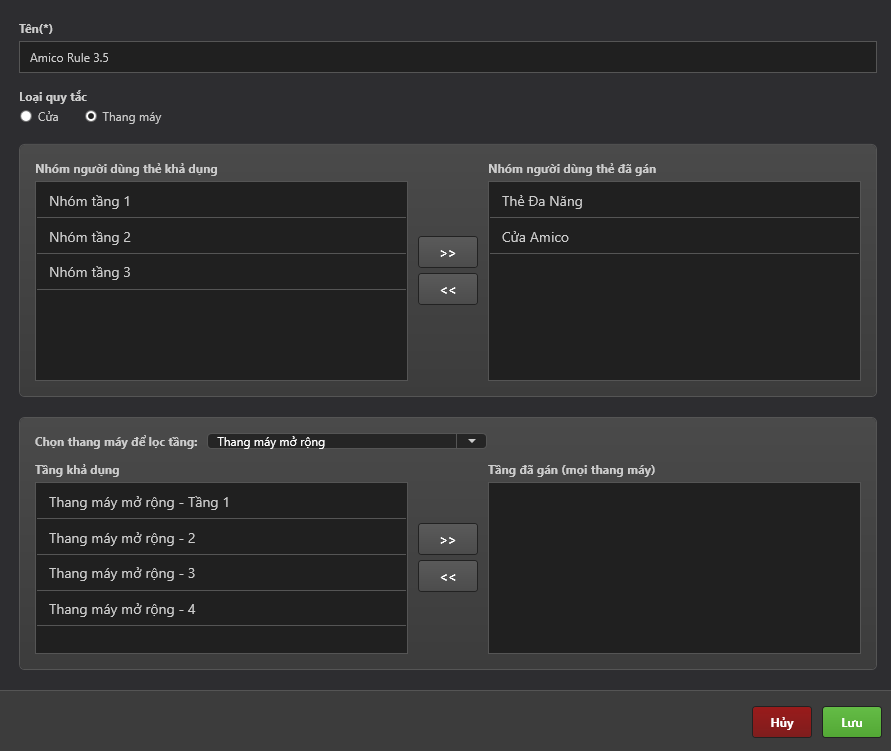
Click Save (Green button) in the bottom right corner for the system to record and immediately sync the permission command down to the Controllers.
3. Editing and Deleting Rules
- Edit: Convenient when you want to add a new Door/Floor to an existing rule, or include a new Department in the list of groups permitted to access an area, without disrupting existing configurations.
- Delete: Immediately revokes all access rights for the groups included in that rule.
Instead of creating many small, individual access rules for each person, it is recommended to first organize personnel into Cardholder Groups, then use this Access Rules module to consolidate groups that share the same movement pattern. This approach makes managing systems with thousands of personnel extremely clean and efficient.