Cardholder Management
The Cardholders module is where you manage the entire personnel database, visitor records, identity credentials (Card, PIN, Fingerprint, Face), and assign access permissions for each individual in the S-Safe system.
1. Main List Interface
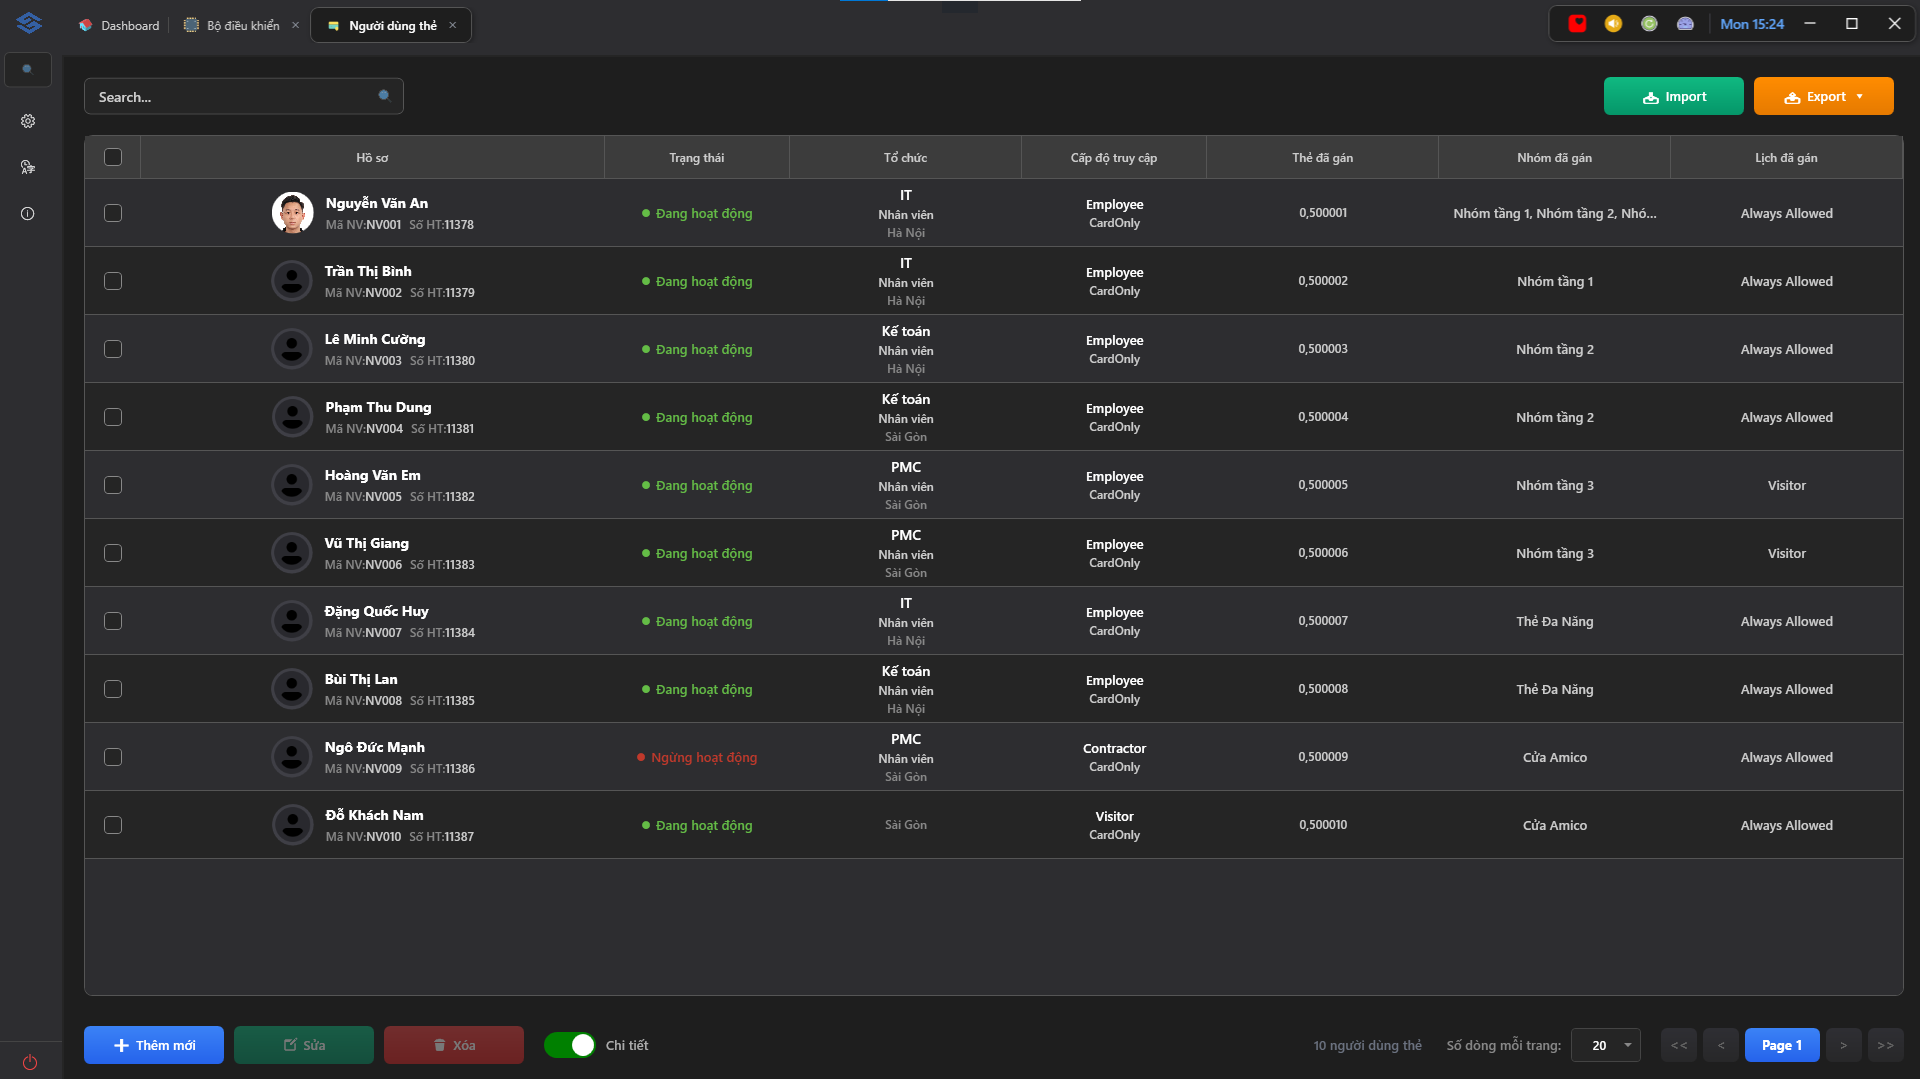
The main screen provides an extremely detailed personnel management listview:
- Profile: Displays the profile photo (including Face Recognition / FR), personnel name, employee code, and system number.
- Status: Tracks the active status of the personnel (
Active/Inactive). - Organization: Quickly view the Department (e.g., IT), Position (Staff), and Branch (Hanoi).
- Access Level: Displays the entity type (Employee, Visitor...) and Access Mode (CardOnly, Face...).
- Assigned Cards & Permissions: Displays the Card ID number, Assigned Groups, and the Time Schedule currently applied.
Toolbar and Actions
- Bulk Import / Export:
- Export 📤 (Orange): Export the full current personnel list to an Excel file.
- Import 📥 (Green): Download the system's Excel template, fill in the data, then upload it to register personnel in bulk.
- Bottom Toolbar: Provides buttons for Add New, Edit, Delete, a "Details" view toggle, and data pagination controls.
The bulk Excel Import feature only applies to raw text data (Name, Employee Code, Department, etc.). The system does NOT support bulk import of profile photos via Excel. Profile photos for each individual must be updated manually.
2. Add New and Detailed Configuration (4-Tab Dialog)
When you click the + Add New ➕ button, the Cardholder Details dialog will appear. Configure all information across 4 functional tabs using the bottom navigation bar (Previous, Next, Cancel, Save & Previous, Save, Save & Next):
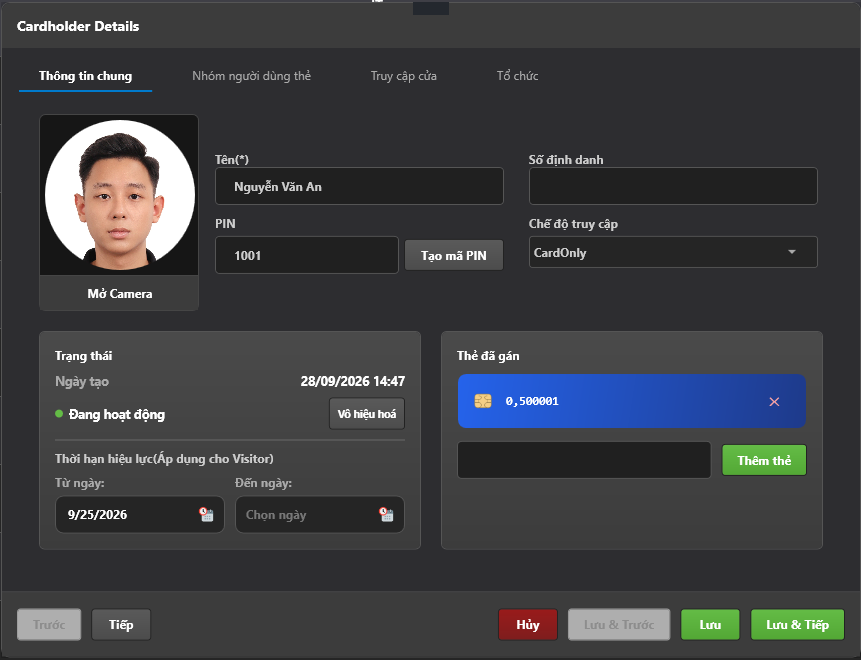
Tab 1: General Information
This section is used for personal identification and card credential management:
- Update Profile Photo: Click Open Camera to capture the face directly via webcam, or upload an existing image.
- Basic Info: Enter the Name (*) (required), ID Number, and select the Access Mode.
- PIN: A personal identification number used for authentication. Enter manually or click Generate PIN for a random code.
- Status & Validity Period: View creation date and current status (includes a Deactivate button to temporarily lock the card). For Visitors, set the
From DateandTo Dateto automatically expire the card. - Assigned Cards: Displays a list of physical cards assigned to the personnel as badges. You can click the
Xicon to revoke a card, or enter a new card number and click Add Card to assign more credentials.
Tab 2: Cardholder Groups
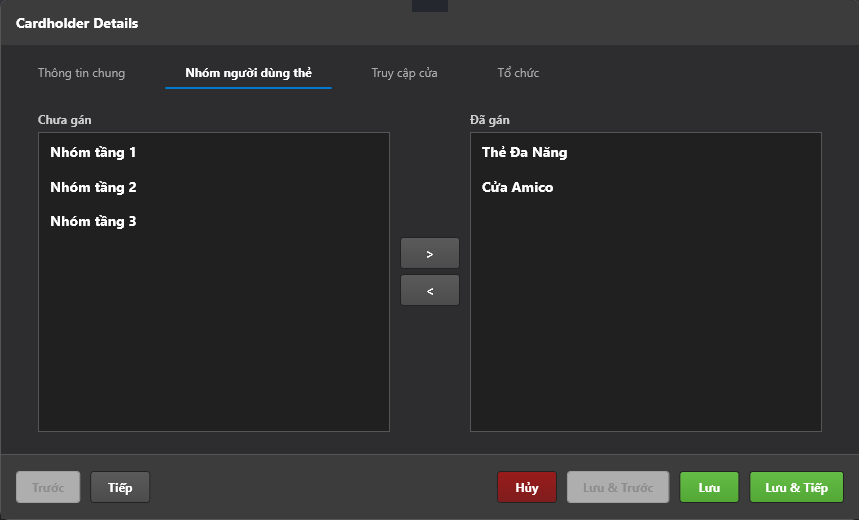
This tab dictates the assignment of access permission groups to the personnel:
- Unassigned Area: Displays existing access groups in the system (e.g., Floor 1 Group, Floor 2 Group).
- Assigned Area: The groups currently inherited by the personnel.
- Intuitive navigation: Select an access group in the Unassigned column, then click the
>button to move it to the Assigned column.
Tab 3: Door Access
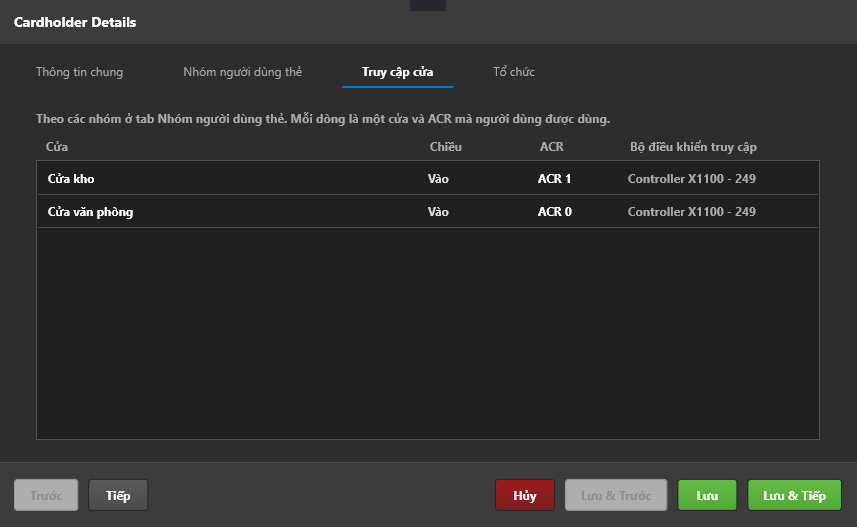
This is a Read-only summary tab based on the access groups assigned in Tab 2.
- It displays a detailed table of doors the personnel is permitted to access, including: Door, Direction (In/Out), ACR, and Access Controller.
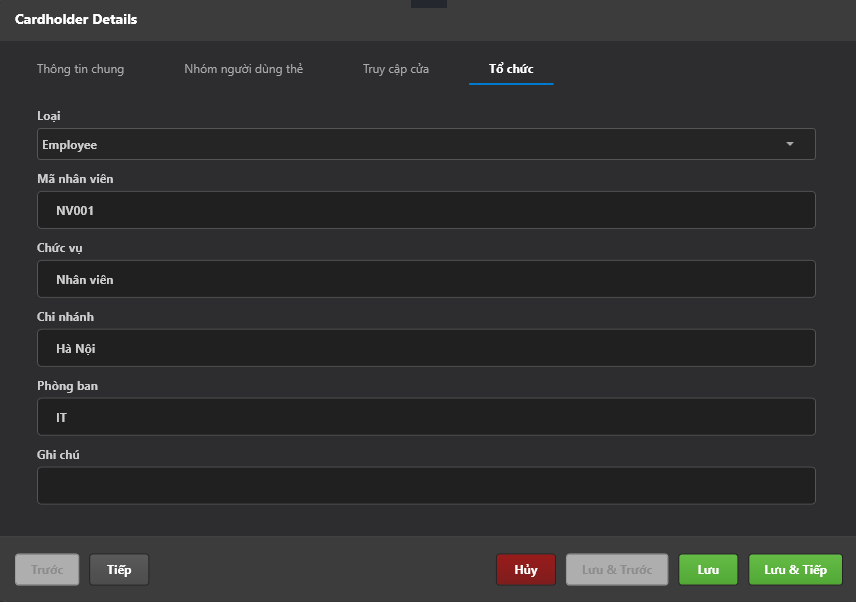
Tab 4: Organization
The area used to classify personnel within the company structure:
- Type: Categorize the individual (e.g.,
Employee,Visitor). - Employee Code: Enter the personnel ID to synchronize with HRM attendance software.
- Position / Branch / Department: Select from the available lists to support data filtering and reporting.
- Note: A text field to add any supplementary information to the profile.
3. Editing and Deleting
- Edit 📝: Select a cardholder and click the green Edit button to update their photo, assign a new card, or change their access groups during a department transfer.
- Delete 🗑️: Select a cardholder and click the red Delete button to permanently remove the account from the system.