Door Management
In the S-Safe system, a Door is a logical object created by mapping physical devices (Readers, Inputs, Outputs) from a Controller together. Door Management allows you to control the flow of personnel, configure lock/unlock time thresholds, and manage security alert signals.
1. Door List Interface
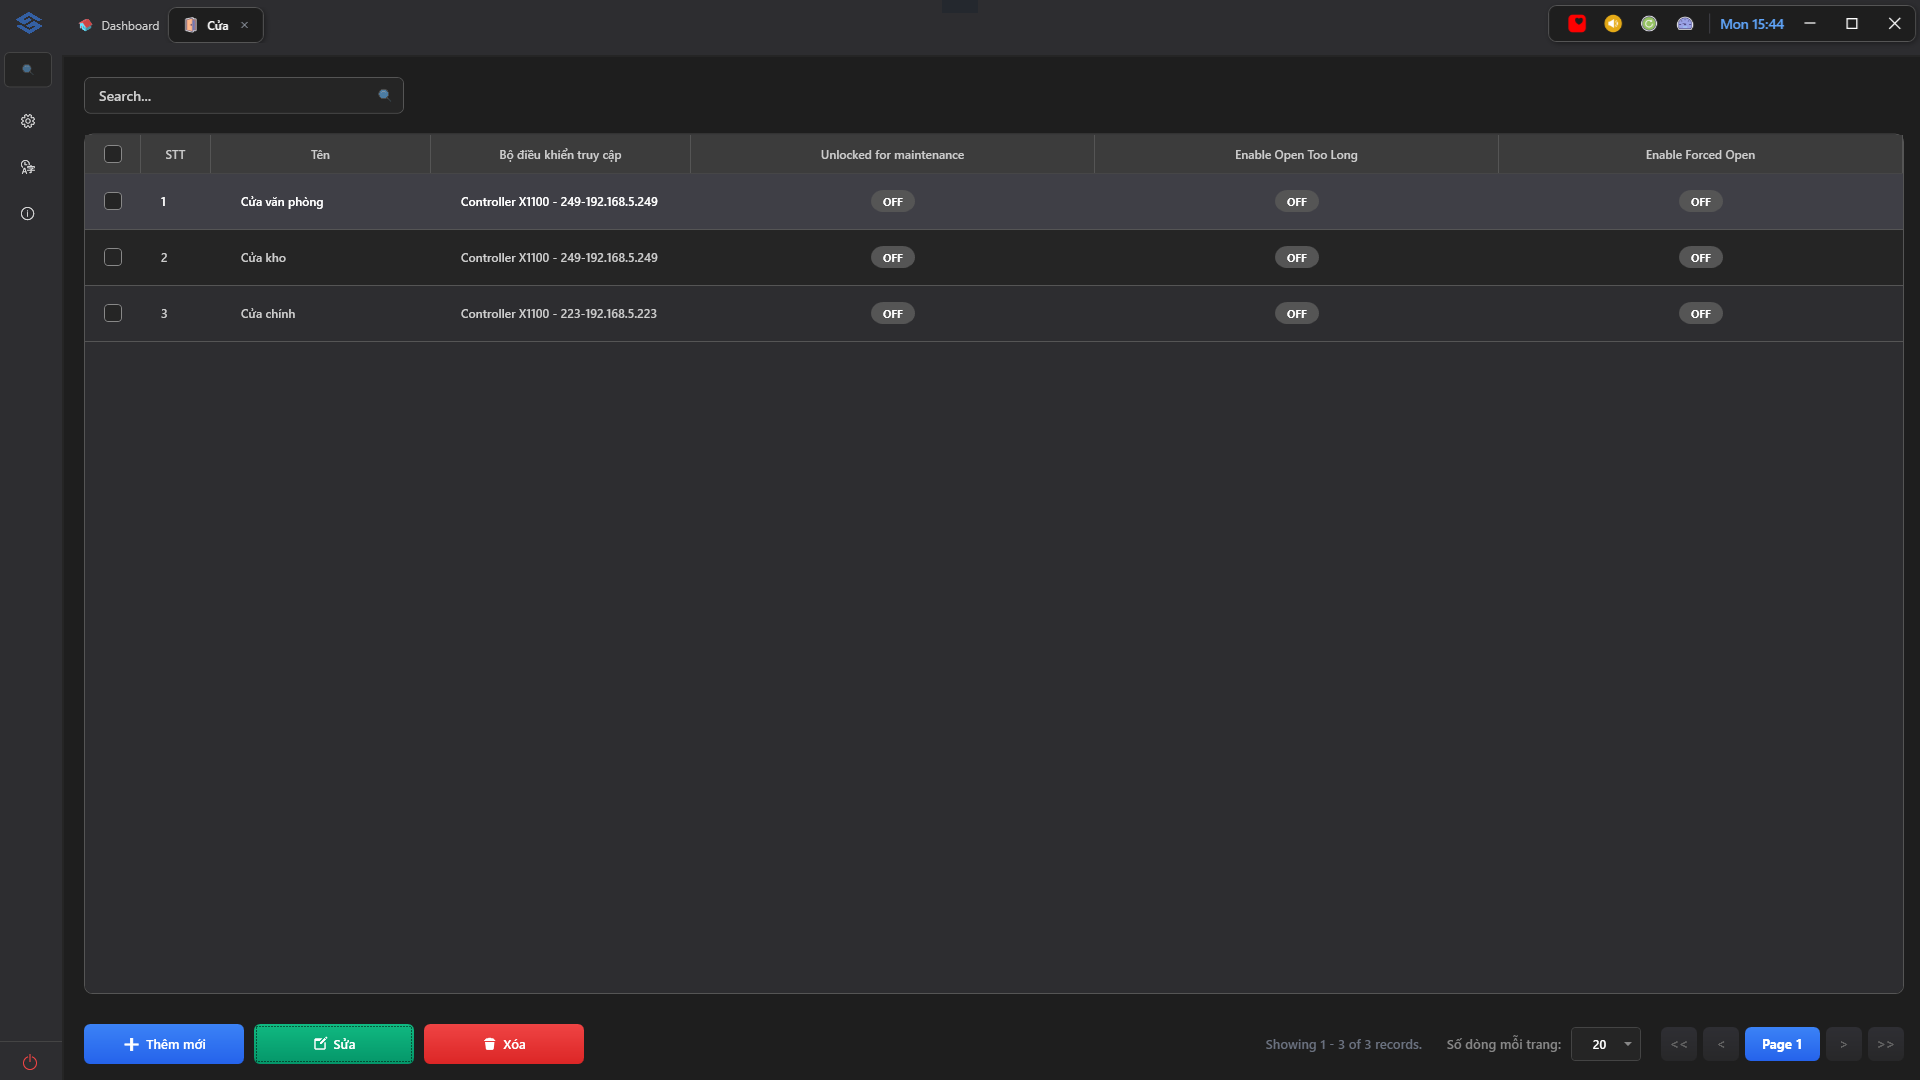
The main screen displays a list of all active Doors in the system in a structured data table:
- Basic Information: No., Door Name, and the Access Controller managing the door (including its IP address).
- Status Toggles: The interface directly displays the current state of security configurations, including:
- Unlocked for maintenance: Status of the free-access unlock mode (typically used during maintenance or office hours).
- Enable Open Too Long: Status of the door-held-open alert feature.
- Enable Forced Open: Status of the forced-open alert feature.
- Action Toolbar: Located at the bottom of the screen, providing Add New (Blue), Edit (Green), and Delete (Red) buttons, along with pagination controls.
2. Adding and Configuring a Door
To create a new Door, click the + Add New button in the bottom toolbar. The Door Configuration dialog is divided into 2 main tabs:
Tab 1: Information (Assign Physical Devices via Drag & Drop)
This area is used to define the hardware components for the Door. The system utilizes an intuitive Drag & Drop mechanism from left to right.
- Select door controller: Choose the physical Controller from the dropdown list in the left column.
- Door Configuration (Right column): Enter an identifying Name (*) for the door (e.g., Office Door).
- Drag and drop components:
- Reader: Drag the Reader icon from the left column and drop it into the Outside Reader or Inside Reader slot on the right. Select the authentication method (e.g., CardOnly). Click the
Xbutton to remove it. - Input: Drag the IN ports and drop them into the Input box. Set the contact state (e.g., NormallyOpen) and the signal type (DoorSensor or ExitButton).
- Output: Drag the Output ports and drop them into the Output box. Set the signal type to DoorStrike (electromagnetic lock).
- Reader: Drag the Reader icon from the left column and drop it into the Outside Reader or Inside Reader slot on the right. Select the authentication method (e.g., CardOnly). Click the
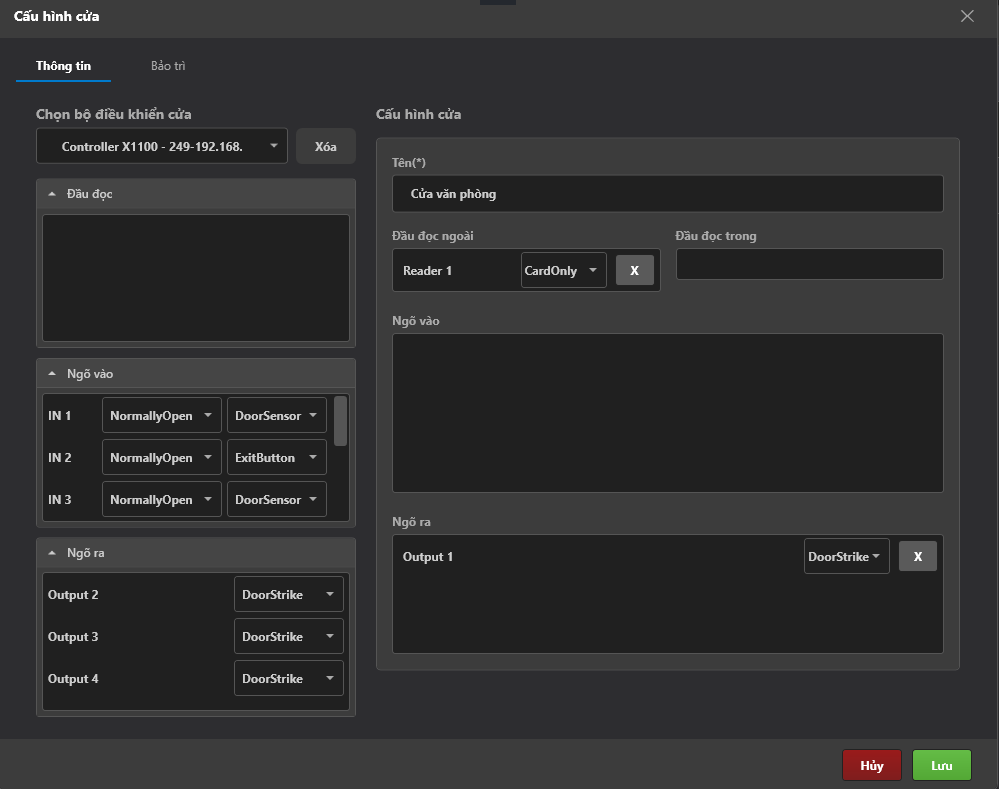
Make sure you cross-reference the actual wiring diagram from the installation technician to correctly map the corresponding IN/OUT ports in the software.
Tab 2: Maintenance (Configure Alerts and Timings)
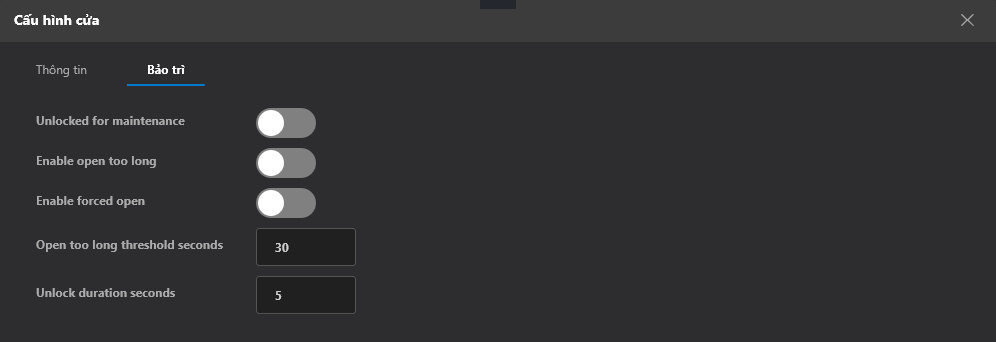
Switch to the "Maintenance" tab to configure operational rules and security time limits for the door:
- Unlocked for maintenance: Enable/disable maintenance unlock mode.
- Enable open too long: Enable/disable the door-held-open-too-long alert.
- Enable forced open: Enable/disable the forced-open alert.
- Open too long threshold seconds: Enter the time limit (e.g., 30 seconds). If the door remains open beyond this duration without closing, the system will trigger an alarm.
- Unlock duration seconds: The relay delay time (e.g., 5 seconds). This is the duration the electromagnetic lock remains released after a valid card swipe.
Once finished, click the Save button (Green) in the bottom right corner to apply the configuration.
3. Editing and Deleting
- Edit: Select a door from the list and click the Edit button in the bottom toolbar to reconfigure settings or replace readers.
- Delete: Select a door and click the Delete button to permanently remove it from the system.
When you delete a Door, the Access Rules currently granting personnel permission to pass through this door may be affected. Review your access permissions after deletion.