Controller Management
The Controller is the central device that acts as the on-site "brain." It directly receives signals from peripheral devices (card readers, push buttons, door sensors) and transmits them to the S-Safe central software for analysis and processing according to the configured rule set.
1. List View Interface
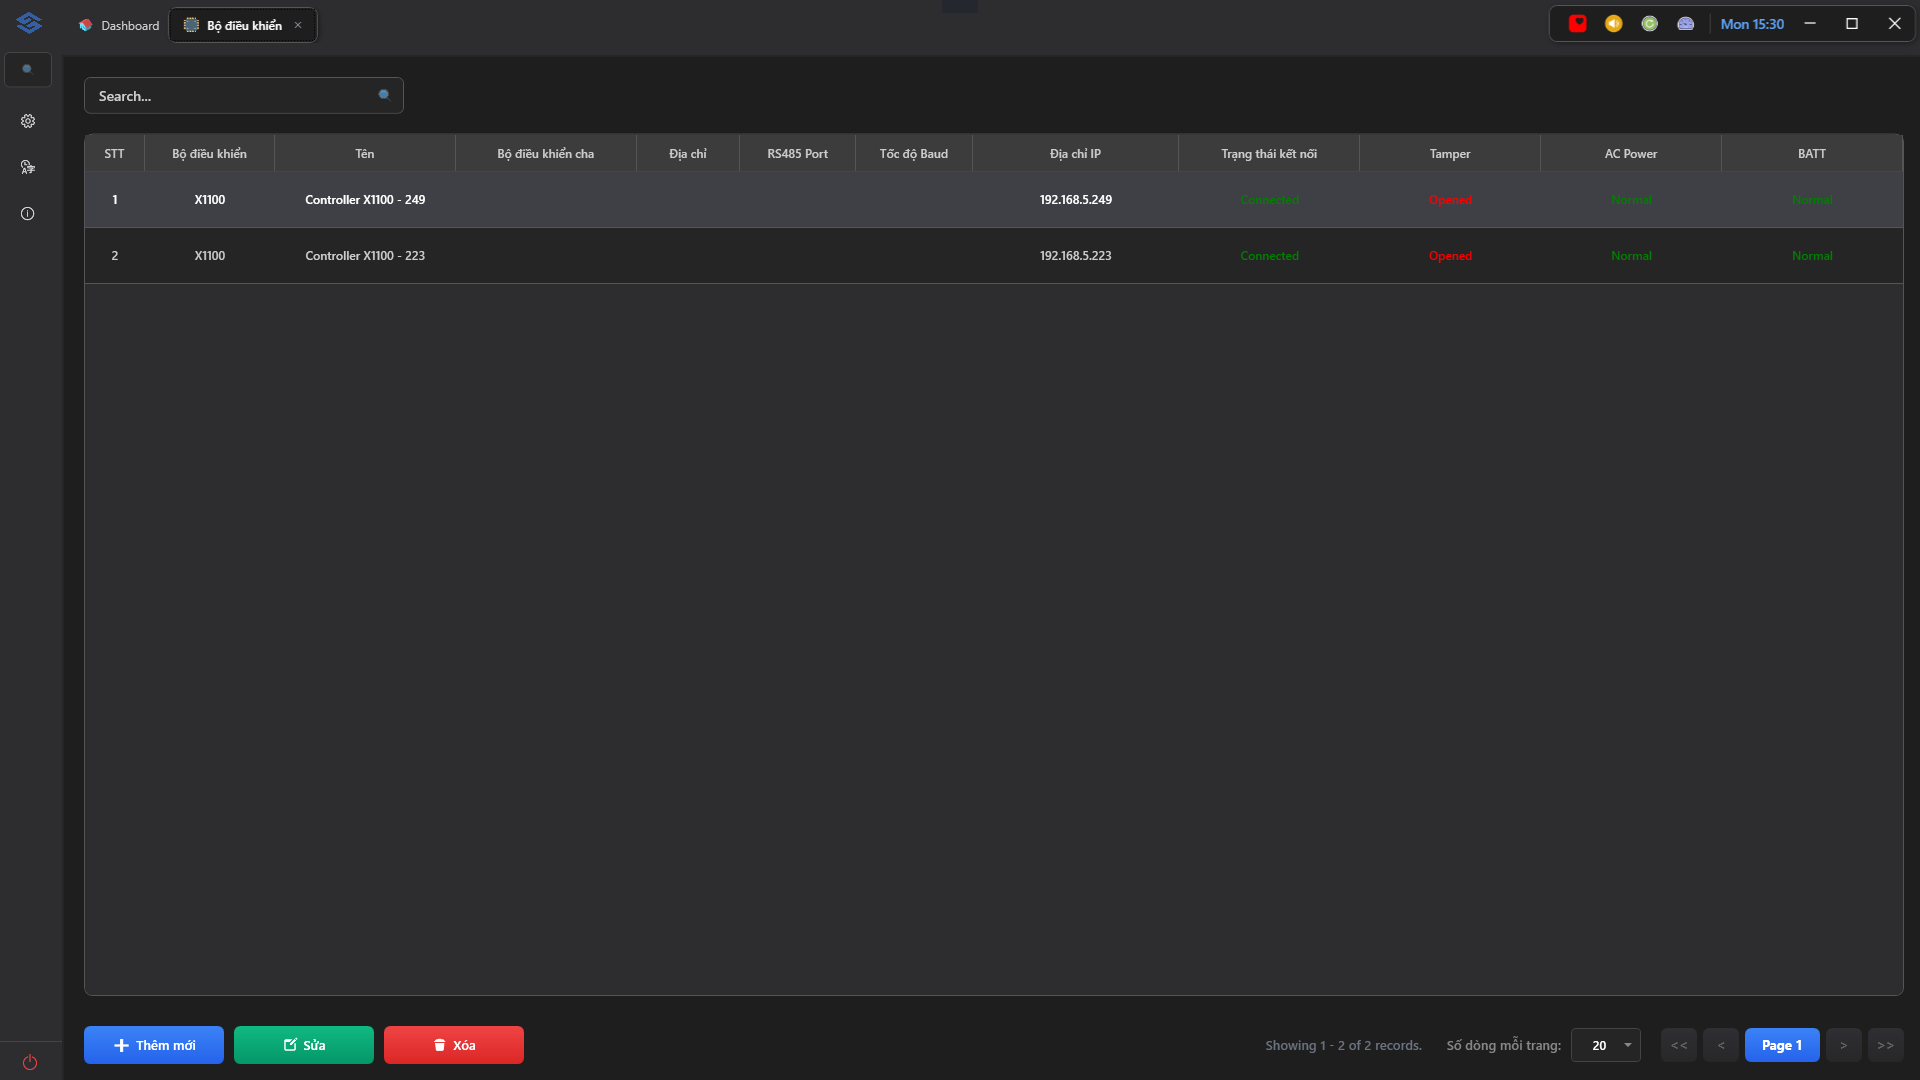
On the main screen of the Controller module, the system displays a listview of all devices currently being managed.
The monitoring interface immediately provides key real-time status parameters to help operators assess the network at a glance:
- Basic Information: No., Controller type (e.g., X1100), Device name, Parent controller, Address, RS485 Port, and Baud rate.
- Hardware Status:
- IP Address: Displays the current IP of the hardware.
- Connection Status: Displays whether the device is
Connected(green) orDisconnected. - Tamper: Triggers an
Openedalert (red) if the device enclosure has been forced open. - AC Power / BATT: Status of the mains power supply and backup battery level, showing
Normal(green) when stable.
2. Main Operations
Adding a New Controller
To register a new controller into the system, follow these steps:
- Click the + Add New button (blue) in the bottom-left corner of the screen.
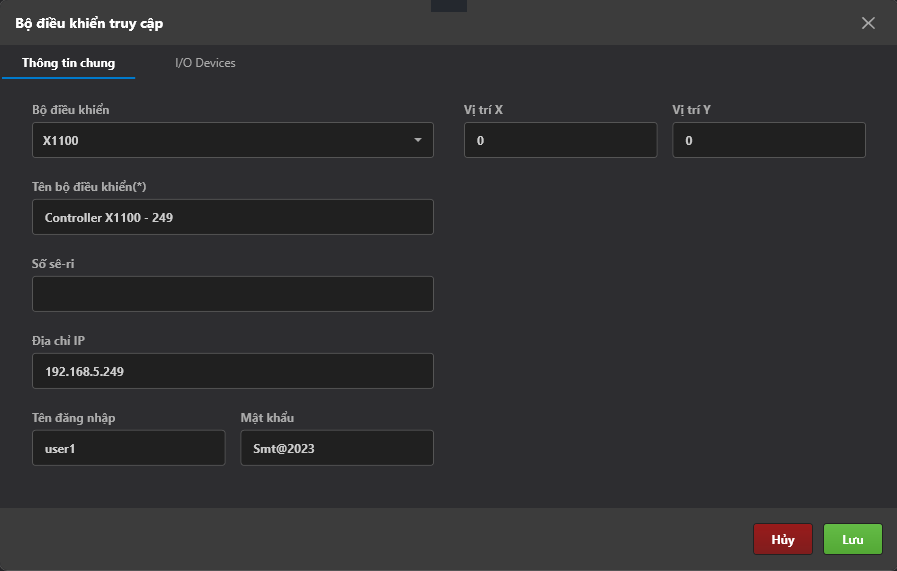
- The Access Controller interface appears, featuring two main configuration tabs:
- General Information Tab:
- Identification Info: Select the Controller type (e.g., X1100), and enter the Controller Name (Required) and Serial Number.
- Network & Account Parameters: Enter the hardware's IP Address accurately (e.g., 192.168.5.249), along with the Username (e.g., user1) and Password to grant the software access to the device.
- Coordinates (E-map): Specify Position X and Position Y for the device.
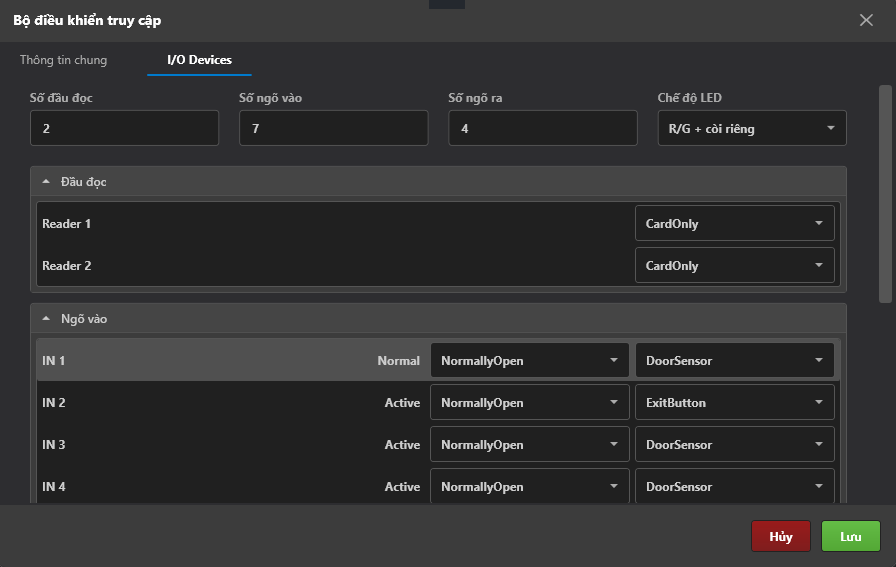
- I/O Devices Tab (Input/Output & Reader Configuration):
- General Parameter Setup: Specify the quantities for Number of Readers (e.g., 2), Number of Inputs (e.g., 7), and Number of Outputs (e.g., 4), as well as the LED Mode (e.g., R/G + separate buzzer).
- Readers: Configure the authentication method for each reader (e.g., select CardOnly for Reader 1 and Reader 2).
- Inputs: Set the current signal state (Normal/Active), signal type (NormallyOpen / NormallyClosed) and assign a function to each input port (e.g., IN 1 as DoorSensor, IN 2 as ExitButton).
- Outputs: Configure the control function for each output port.
- General Information Tab:
- Review the information and click the Save button (green) in the bottom-right corner to complete the process. The new device will immediately appear in the list. To cancel the operation, click Cancel (red).
Ensure that the server running S-Safe and the physical Controllers are on the same network (able to ping the device IP) before registering them in the software, so that the connection status is displayed accurately.
Editing Device Information
- Check the box next to the device you wish to edit, then click the Edit button (green) in the bottom toolbar.
- The update form will display all previously configured parameters. Modify the required fields and click Save.
Deleting a Device
- Check the box next to the device you wish to remove, then click the Delete button (red) in the bottom toolbar.
- The system will display a confirmation dialog to prevent accidental deletion. Click confirm to permanently remove the controller from the database.
Deleting a Controller will directly affect the Doors and Readers that are currently assigned to it. Make sure you have removed all associated software links before performing the delete operation.