Visitor Management
The Visitor module provides a workflow for welcoming and granting temporary access to guests, short-term contractors, or partners. The system supports storing ID card (CCCD) photos and printing quick-access QR codes so visitors can scan themselves at doors or lobby turnstiles without needing expensive physical access cards.
1. Main List Interface
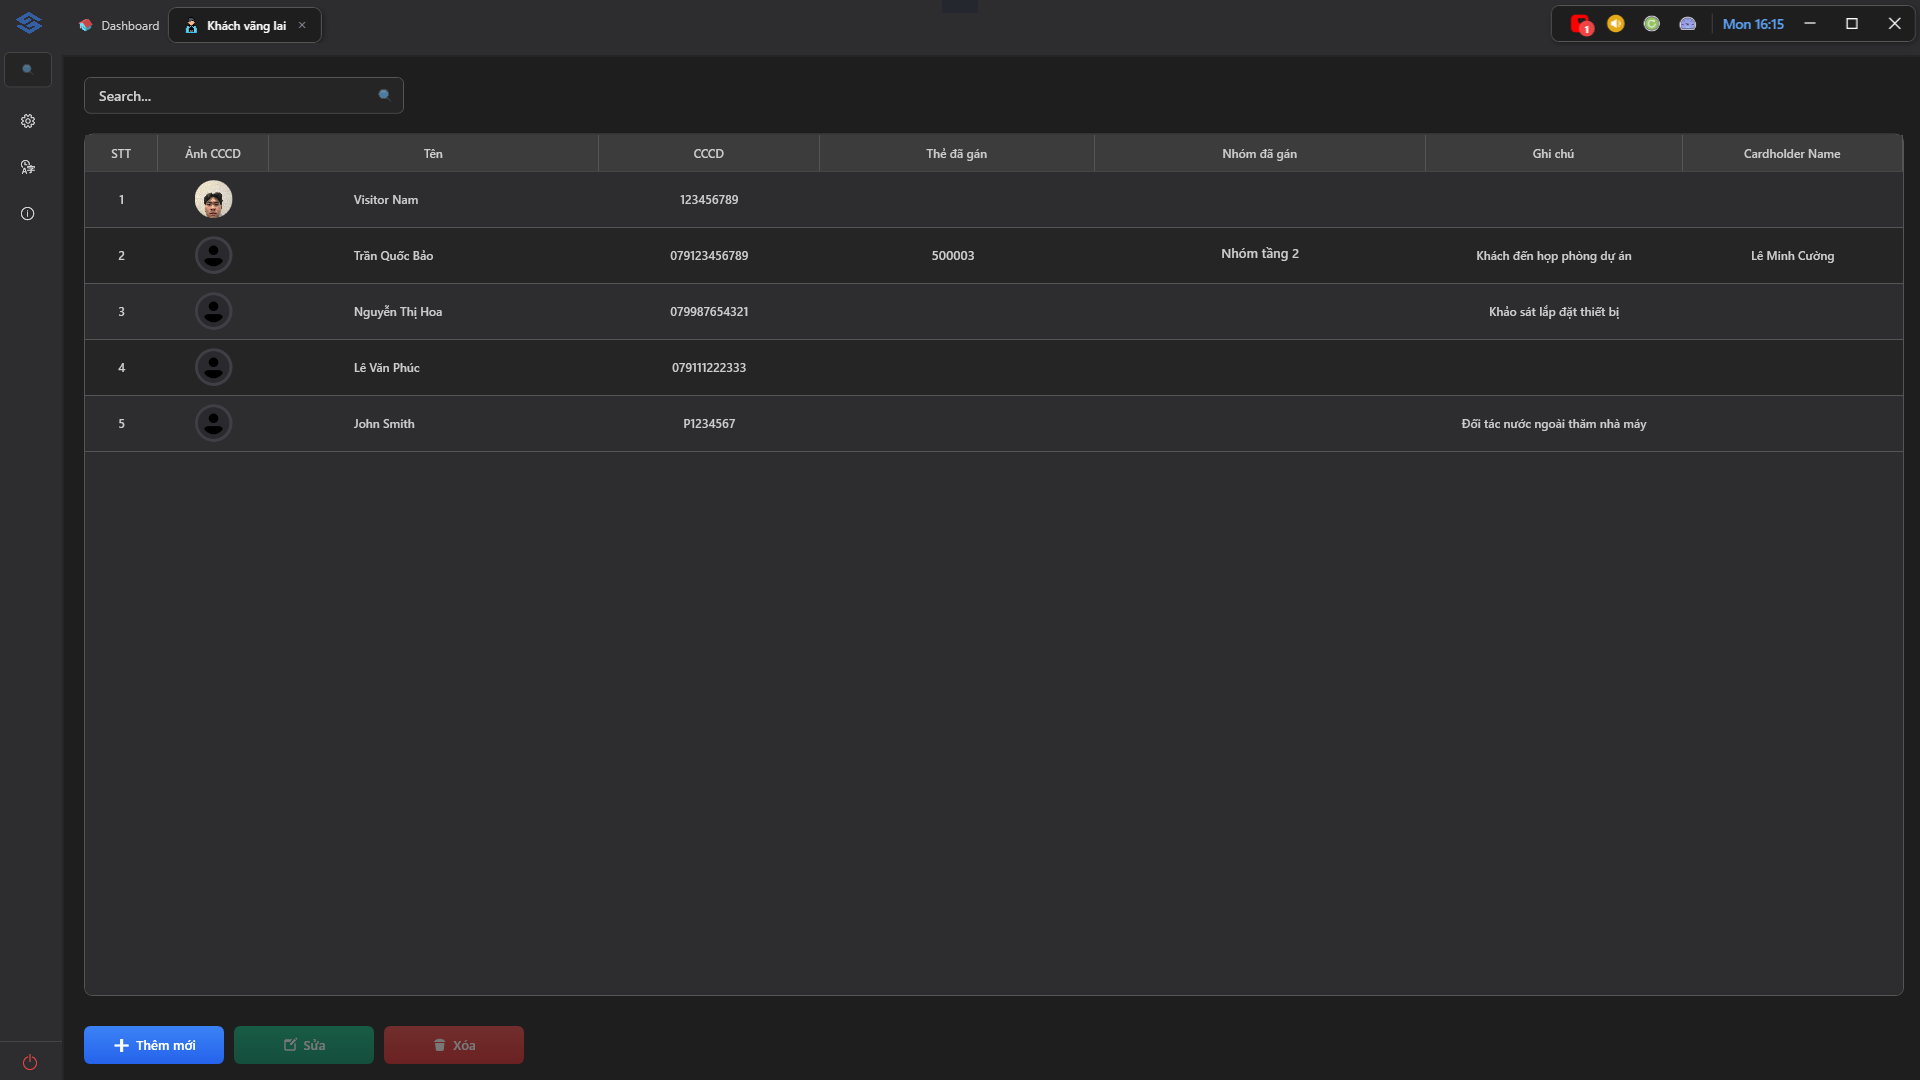
The screen displays a listview of all visitors who have appointments or are currently in the building:
- No. / ID Photo: The sequential number and a photo of the visitor's ID card for security verification.
- Name / ID Number (CCCD): The full name and national ID number of the visitor.
- Assigned Card / Assigned Group: The physical card number issued (if any) and the Access Group defining where the visitor is allowed to move (e.g., Floor 2 Group).
- Note: Information regarding the purpose of the visit (e.g., Meeting at the project room).
- Cardholder Name: The internal employee acting as the sponsor or host for the visitor.
- Bottom Toolbar: Contains the Add New (Blue), Edit (Green), and Delete (Red) action buttons.
2. Adding and Welcoming Visitors
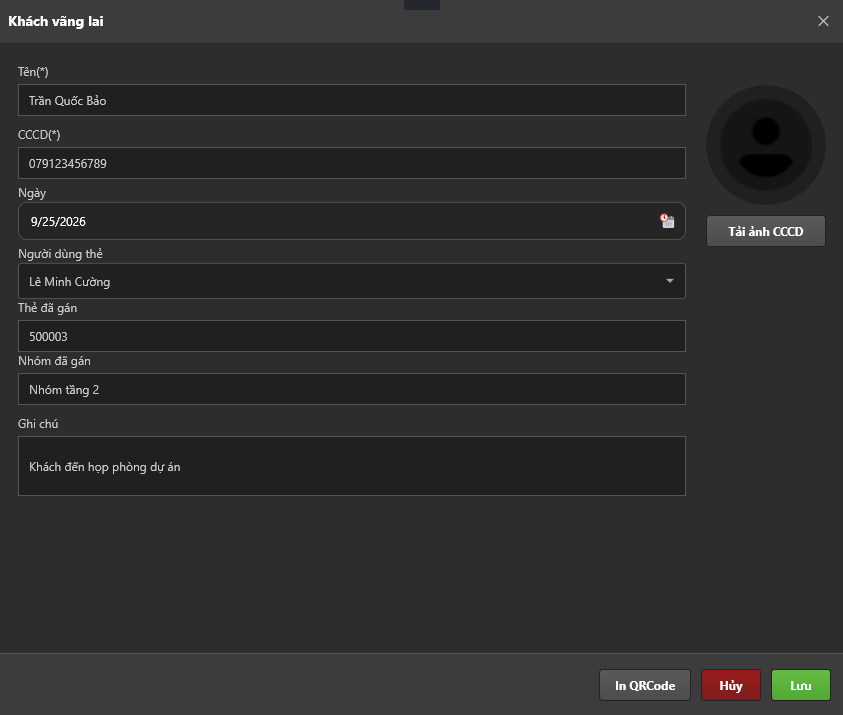
When a visitor arrives, the receptionist or security guard clicks the + Add New button in the bottom left corner to open the configuration dialog:
- Name () / ID Number (): Enter the visitor's full name and ID number (Required fields).
- Date: Select the date of the visit. The system will automatically restrict the validity of the QR code and access rights to this specific time frame.
- Cardholder: Select the internal employee responsible for hosting or sponsoring the visitor from the dropdown list.
- Assigned Card / Assigned Group: Declare the physical card number (if issued) and select the Access Group for the visitor.
- Note: Enter the purpose of the visit or any additional remarks.
- Upload ID Photo (Right side): Click the button to upload or capture the visitor's face or ID card for the security archive.
3. Temporary Access QR Code Printing Process
To provide access credentials to visitors professionally and cost-effectively, the system supports generating QR Codes:
- In the Visitor configuration dialog, after filling in all the required information, click the Print QRCode button in the bottom right corner.
- The system will immediately connect to the configured printer to print a paper slip containing a temporary access QR code.
- Visitors can use this printed QR code to scan directly on the Access Control Cameras located at the doors. The system will unlock the door provided the QR code is scanned within the valid time frame (Date) configured in the software.